Showing posts with label heat embossing. Show all posts

Thursday, March 19, 2015

March Madness Blog Hop


Cool new ideas from some of my favorite Stampin' Up! demonstrators is my idea of some March Madness to get truly excited about!!  If you got here from Heidi's blog, I'm sure you agree.

My first contribution is inspired by the soon-to-be unavailable Sheer Perfection printed vellum.  I accidentally used retired Midnight Muse instead of current color Night of Navy, but I think you'll get the idea!!  I like the toile effect I got from stamping the Everything Eleanor flowers all over a sheet of vellum cardstock.  Since I adhered the vellum to the back of the card, there's no worries about it showing through - nice!  The sentiment from Lacy & Lovely is heat-embossed in white and one side of the punched oval is adhered to the card base with dimensionals.  The other side of the oval has no adhesive, it just overlaps the vellum flap to keep it closed.


Next, I tried rotating the card, and adding a little color to the back of the vellum with Stampin' Write markers.  I think I like this one a little better, how about you?


Finally, a thank you card for my son's Den to give to the Pack Committee Chair and Pack Master at their Blue and Gold Crossover banquet, created with the soon-to-be unavailable My Digital Studio software.  Farewell Cub Scouts, and farewell MDS!!


Wednesday, December 19, 2012

Last-minute CAS for Christmas

I always seem to find myself making a few more Christmas cards at the last minute.  Sadly, thanks to the last minute thing, I'm far less than thrilled with how these photos came out!


Single-layer card with white embossing and clear (NOT yellow) rhinestones on Basic Gray cardstock.  
Snowflake image from Stampin' Up! Mixed Bunch stamp set.  I mixed a touch of Iridescent Ice emossing powder in with the white and it gave the snowflakes a subtle sparkle that I thought was just right for the feeling of softly falling snow against the gray background.   The photo just doesn't do this card justice.   I think I'm going to try this again for holiday thank you notes using Midnight Muse cardstock and the sentiment from Curly Cute.


Embossed the same image onto white this time and sponged each snowflake with Island Indigo and a touch of Not Quite Navy.  The sentiment is from one of the German sets available in the USA, Kleiner Wortschatz, and it's embossed in white onto the colored base.  


Hope you enjoyed these... have a peaceful holiday!


Thursday, August 9, 2012

Fall-i-days Llama Blog Hop

The Stamping Llamas are planning a blog hop every month starting now through the holidays.   You will be treated to gorgeous projects using products from the Stampin' Up! Annual and Holiday catalogs!  I'm going to try and do one Christmas project for each hop as well as things for each of the Fall-i-days.


Back to School

My two favorite fallbacks for handmade teacher gifts are packaged cards and decorated hand sanitizer.   Pretty + Practical = Perfect!   I posted some monogrammed notecards here, but here is this year's version of something every elementary school teacher needs:


Stamps:  Four Seasons (Hostess Exclusive),  acorn from Day of Gratitude   
Ink/Markers:  Pool Party, More Mustard, Soft Suede, Early Expresso, Riding Hood Red 
Cardstock:  Pool Party, More Mustard, Early Expresso, Very Vanilla   
Tools: 3/4" and 1" circle punches, 2 3/8" Scallop Circle Punch, Perfect Pennants Bigz Die
Accessories:  Very Vanilla seam binding ribbon


Christmas

When designing Christmas cards, it's good to think about how easy and cost-effective  it will be to mass-produce the card.  I like the challenge of making something that is simple, yet still gets an "oooooh" from the recipient!   I made a few different versions of this card; do you have a favorite?   

Here, the first and most CAS version:  single layer, just stamping and punching:


The second version has the snowflake image stamped in Versamark all over the background and embossed with Iridescent Ice powder for a little extra shimmer:


On this one, I created the look of a banner using the Simply Scored tool.


On this last version I used the Simply Scored to create a simple frame around the image:


Stamps:  Four Seasons (Hostess Exclusive),  snowflake from Every Little Bit,  greeting from Curly Cute.   
Ink:  Wisteria Wonder 
Cardstock:  Whisper White 
Tools: 3/4" and 1" circle punches, Simply Scored or heat gun (depending on which version)
Accessories:  Silver Glimmer paper


P.S.  The other day I promised cards with birds, and here I've used the Four Seasons set twice and both times I covered up the adorable bird!   Don't worry, I've been busy and more birds are in this next post!


You can use these gorgeous buttons (that Stephanie designed in MDS2) to navigate the hop.


Friday, May 4, 2012

Goodbye Fine Flourish

I love this smaller background stamp.   Such an absolutely gorgeous pattern that can be used in so many different ways.  Say goodbye, since it is retiring on May 31st...

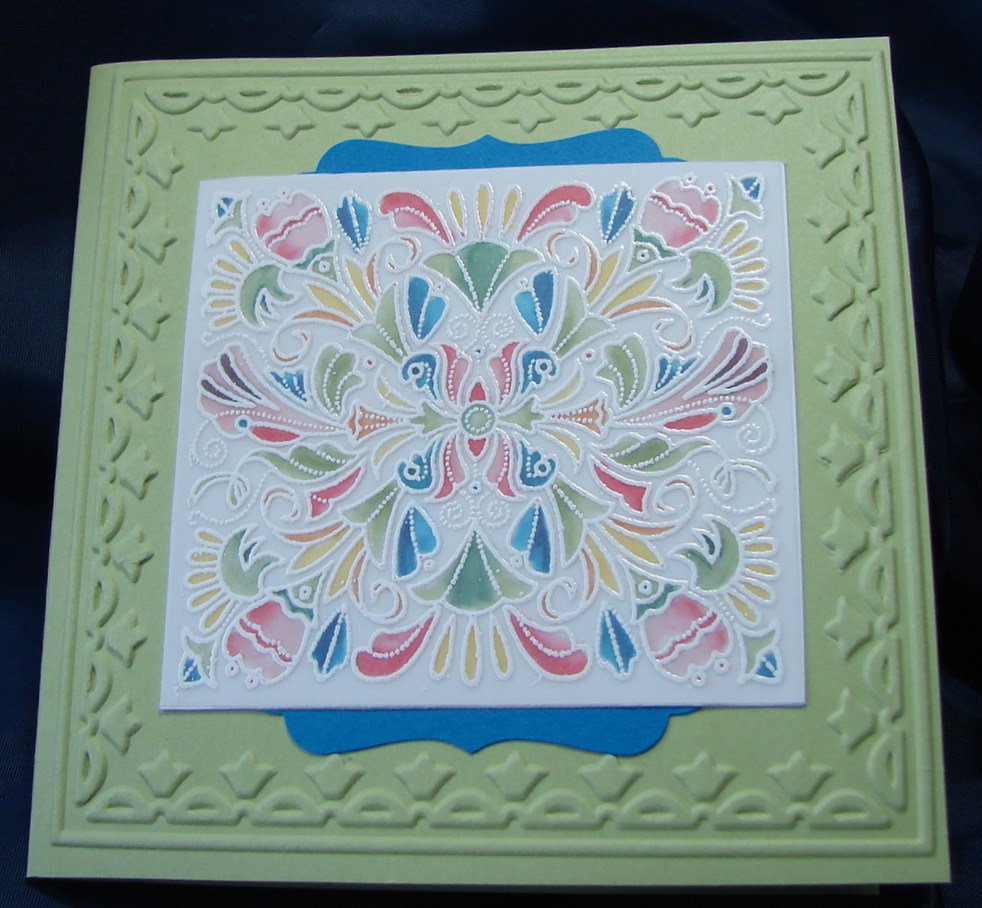
These first two cards were made using the stained glass technique.  You emboss the image onto vellum then color on the back side with markers.  BTW, most of the marker colors on these cards are the 2010-2012 In Colors, so they are also "retiring soon".


Both cards also feature the Framed Tulips embossing folder.   The sentiment is from Sincere Salutations, available from Stampin' Up! only through the end of May 2012.  I thought I had put a pearl in the center of the card with the Pear Pizzazz base, but I'm not seeing it in that picture, are you?!

 The next card uses emboss resist; heat emboss the image (here with Gold embossing powder), sponge with ink in different colors, wipe clean.  Ink and cardstock in Pool Party (that is SO hard for me to type correctly!), Wisteria Wonder and Marina Mist.


Wednesday, December 7, 2011

Finding some Christmas spirit

Been feeling utterly blah and out of Christmas spirit so far this year.   You'd think with 2 young kids I'd be excited, but I have been feeling utterly uninspired.   I've been looking at pretty cards other people have made (the Artistic Avenger in particular), and thought I should just sit down at my craft table and MAKE one already!   I knew I wanted to emboss Dasher in gold on red, and the ribbon was on the Clearance Rack last month, and the rest of the design grew from there.   Not really a card for mass production which is probably what I should be working on, but I'm happy with it!   Maybe I could open a box or two of decorations now!


This card is made exclusively with Stampin' Up! products :)


Stamps:  Dasher (golden focal image), Perfect Punches (sentiment), Triple Treat Flower (in gold on green CS)
Cardstock:  Very Vanilla, Riding Hood Red, Garden Green
Ink:  Versamark & Riding Hood Red
Accessories:  Gold Stampin' Emboss powder, retired striped grosgrain ribbon in Riding Hood Red
Tools:  Framed Tulips Embossing Folder, 1 3/4" Scallop Circle Punch, 5-petal flower punch (for leaf), Heat Gun