Showing posts with label Halloween. Show all posts

Wednesday, October 24, 2012

Welcome to Wayback Wednesday

Wayback Wednesdays feature at least one retired product.  This Halloween card uses one of my favorite retired Stampin' Up! punches.  I CASEd the idea from Andrea Walford, but as most of us do when CASEing, I added my own twist to her card.  


Rather than mask a circle for the moon while sponging the background, I used a large circle punch on So Saffron card stock; stamped it in gray with the splotch from French Foliage, and sponged the edges with Pumpkin Pie and a touch of Cajun Craze for my harvest moon.  

She drew her bat, I made mine from black Shrinky Dink plastic and the Bitty Bat punch (retired but still available on the Clearance Rack; wink, wink).2


Clouds: Frost White shimmer paint

Sentiment from Delightful Dozen stamped in Craft White ink.  I used white embossing powder on the words and the Black Magic Technique to color the pumpkin (colored pencils on white ink on a black background).

Inks for night sky background: Basic Black, Elegant Eggplant, Midnight Muse and Marina Mist.

Thursday, September 13, 2012

Halloween Llama Blog Hop


So excited that the second in our series of Fall-i-days blog hops is finally here, and I'm at the beginning of it!   I know my fellow demonstrators have come up with fun and inspiring projects for you!   For links to all their blogs and all of our llama hops, click on the gorgeous banner up there that Stephanie created!

The first thing I'd like to share with you today is a Halloween card.   I love the versatility of stamp sets like this one with lots of little images; they work for treats, tags, cards, anything really!  So cute, too.


Stamps: Spooky Bingo Bits 
Ink: Basic Black, Old Olive, Rich Razzleberry, Pumpkin Pie 
Cardstock: Old Olive, Basic Black, Very Vanilla, Pumpkin Pie 
Tools / Accessories: 1" circle & Curly Label punches, Stampin' Dimensionals
Technique:  Faux Tearing (sponging w/ a torn mask) and actual tearing


Next is a teacher thank you card I created for this week's Mojo Monday sketch challenge using My Digital Studio.   Since version 2 of the software is now in full release, Stampin' Up! is donating the remaining disks of version 1 to schools.   Contact me or your local demonstrator if you would like more information.


I printed out the image from Greeting Card Kids and colored it by hand, then scanned it in and inserted it into my project like a photograph. Used the eyedropper tool to color the circles and the mat of the oval the same red as the girl's apple and the blue of the boy's book.  In the new version of the software, images can be colored digitally; so easy! 


Finally, the first card I've ever made with French Foliage!  A wedding invitation inspired me to make a card stamped with purple leaves.  What do you think?

Stamps: French Foliage, Curly Cute 
Ink: Crumb Cake, Elegant Eggplant, Rich Razzleberry 
Cardstock: Whisper White, Perfect Plum 
Accessories: Linen Thread
Technique: OSW (one-sheet wonder:  create your own patterned paper with your stamps, here I did a half sheet that I cut into strips to make a set of matching cards)

Next in the hop is Marsha, or, if you like to do things backwards, click on the other button to head back to Debbie!


Tuesday, April 10, 2012

Hybrid Halloween card

Halloween in April?   Well, I actually made this card in the fall, but it uses Peach Parfait as the base, and I've just suddenly realized that this is the perfect shade of orange, but it's only going to be available for about 6 more weeks, so I thought I'd better post this now!   The adorable little witch is from the Greeting Card Kids stamp set, but if you have the set, you may notice that she seems larger here.   That's because mine is from the digital version for My Digital Studio - she can shrink or grow to whatever size you like.   Cool, eh?


More Peach Parfait coming soon in the Stampin Llamas Colors of Spring Blog Hop!

Sunday, November 20, 2011

I Adore Simply Adorned!

I love decorating for the holidays, and Simply Adorned lets me decorate myself without looking like I'm in the Tackiest Outfit Contest at work!  Inserts are quick and fun to make, easy to coordinate to outfits, seasons and events.

This one uses Pumpkin Pie and Old Olive Cardstock.   Stamped the spiderweb from Spooky Bingo Bits onto the orange, the spider onto the green (yes, it was tough to cut out even with Paper Snips, but so worth it!).   Colored the rhinestone with a purple Sharpie to get all the Halloween colors in!

I love this little Turkey from the Gift Givers stamp set!   I stamped him once onto Pear Pizzazz and twice onto Whisper White, colored, cut and layered to give it some dimension and interest.


Another image from Gift Givers - the cute reindeer - stamped 3 times, cut and layered and some Crystal Effects added to the nose for more dimension.   The sentiment is from Short and Sweet.


 This last insert shows how tiny these pieces are, which is why they come together so quickly!   Here I layered the cupcake from Short and Sweet, framed it with one of the images from Four Frames, and embellished with a tiny pearl colored with a Sharpie - sweet!
 

Thursday, November 3, 2011

MDS Freebies unveiled


For the next 3 days, Stampin' Up! is offering four brand-new digital downloads to everyone, for free, so of course I snatched those right up and made some stuff right away!   Gotta love how quick it is to create with My Digital Studio.


This cute card uses the free So Typefelt Stampbrush set along with a card template I got when I purchased the Owl Punch download for a mere 95 cents!   That's another thing I love about digital - the supplies are so inexpensive, and store compactly right inside my computer.  Unlike my real craft room, everything is always in it's place in the digital craft room!
This scrapbook page looks professionally done because it is!   I just popped a couple of photos into the free Delight in the Day Designer Template Page, added my journaling to the  text box, and DONE.   On the owl card, I switched up the colors and embellishments to personalize the project, or you can start completely from scratch to create your own projects.   Sometimes I like instant gratification, and sometimes I want to make something truly unique and lose myself in the process.  With MDS, I can do both.


Starting November 8th, 2011, they will still be available, but not for free!


Saturday, October 29, 2011

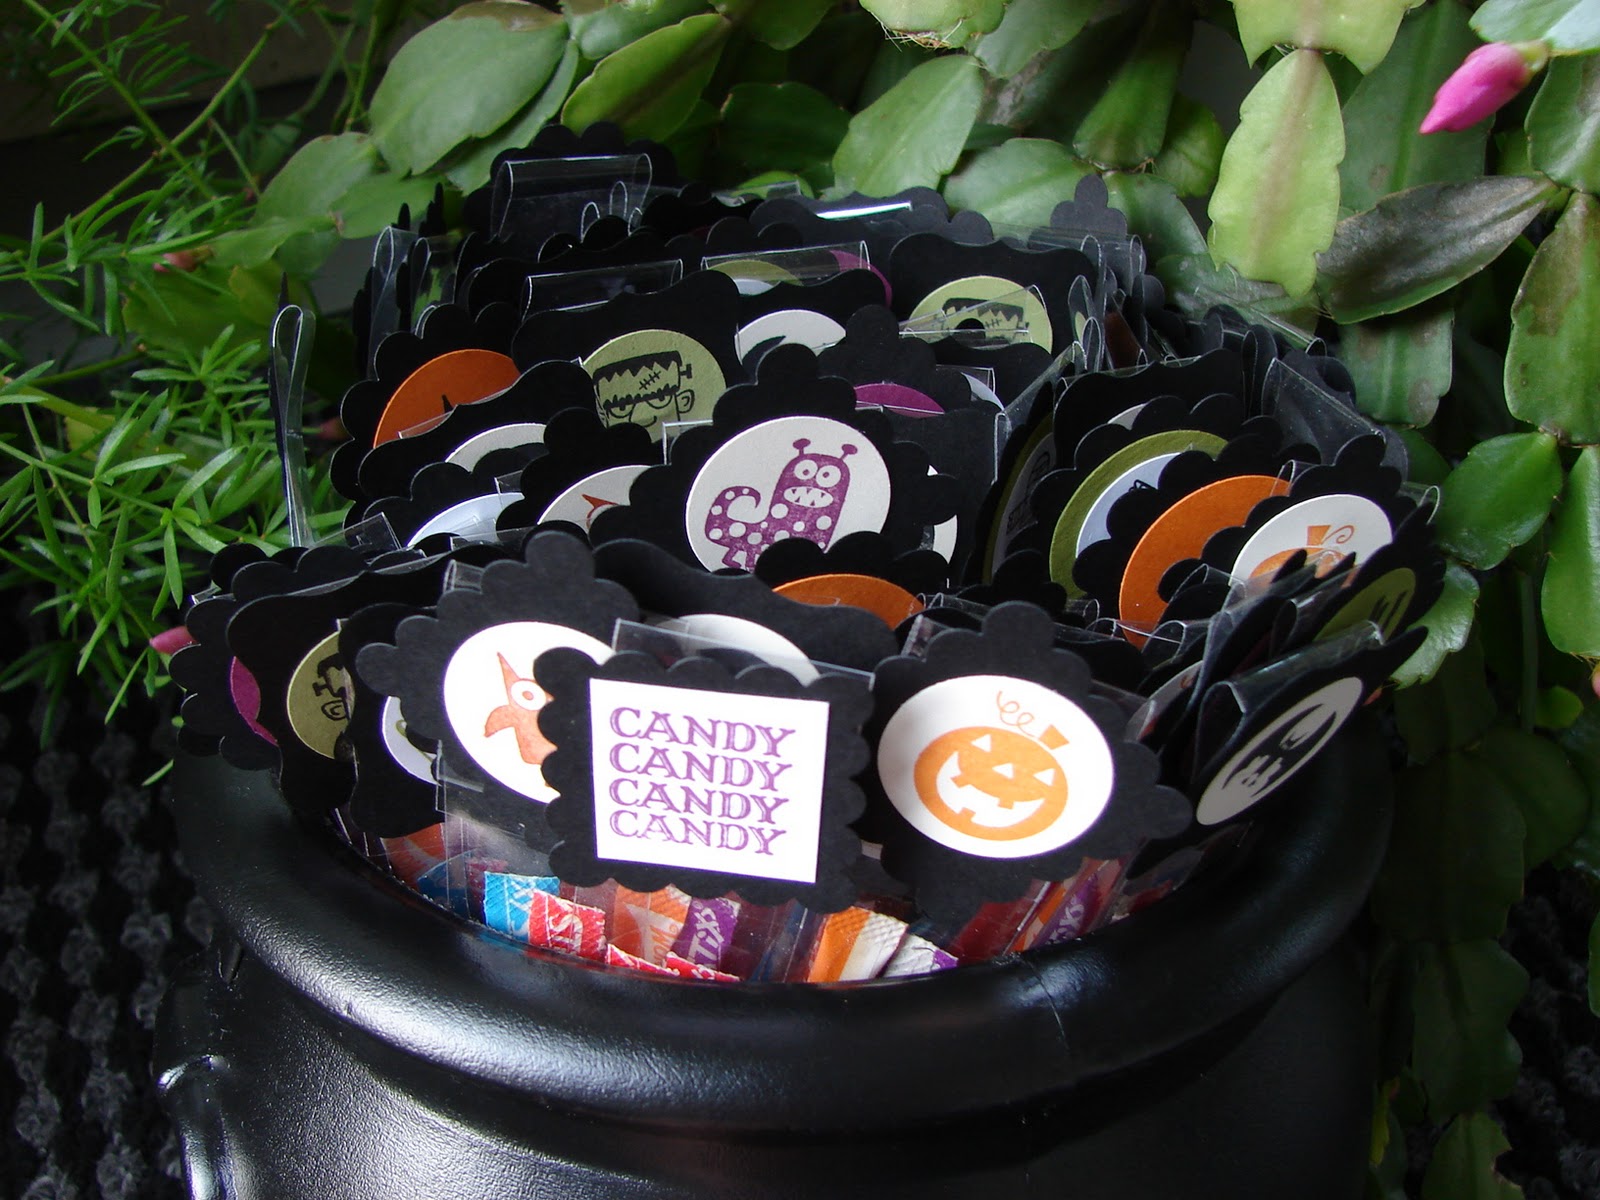
Halloween Treats!

Spooky Bingo Bits

This stamp set was one of the first to go on my "gotta have" list when I got this year's Idea Book and Catalog.  Then, when I saw the 1x8 cello bags in the Holiday Mini, I knew I had been right.   I mean, aren't these the cutest?   The Cub Scouts and their parents thought so!

 Yes, my Christmas cactus is very confused!

Colors of ink and cardstock: Basic Black, Old Olive, Rich Razzleberry, Pumpkin Pie
Punches:  1" circle, 1 1/4" circle,  Scallop Circle, Curly Label, Scallop Square

All products used available from Stampin' Up!   

Saturday, October 22, 2011

Llama Holiday Blog Hop

You probably arrived here from Kath's blog.  If not, make sure you check out the gorgeous projects she created!

Gift Givers - cutest set in the Holiday Mini!   I love this adorable and versatile set, and it seemed like the perfect thing to showcase for our Llama all-holiday hop.

Halloween decor or treat holder


My son's teacher and his Den Mother will both be getting one of these  little hats very soon!  I was really torn this year trying to decide "witch" die to order for my Big Shot.  I finally decided on the Petal Cone die, because I was so impressed with how versatile it is.   Not just pretty Victorian-style treat-holders, you can also make hats, baskets, hearts, carrots, and maybe even more things I haven't seen yet.   Here I used 2 1/2 die cuts instead of the usual 2 to make a hat with a pentagon base instead of a square base.  Can't find my circle cutter yet (I moved a few weeks ago), so I traced a dessert plate onto the Basic Black cardstock for the brim.   Sadly, they retired all the Halloween colors of striped grosgrain ribbon, tho they do still make it in black... 


Thanksgiving napkin ring


Used the Lace Ribbon Border Punch on Chocolate Chip cardstock to make this super-easy napkin ring.   Just glue the ends together, then glue on the funny little turkey.   I don't have the Curly Label Punch yet... better put it on my next order so I can whip up a couple dozen of these for my family's holiday get-togethers!    The napkin is embossed with the Finial Press folder.


Christmas Card


I got some of these oh-so-pretty Everyday Elegance Simply Sent kits during the October promotion.   If you buy 2 kits before the end of the month you can choose one of the coordinating stamp sets FREE.   Here, tho, I'm using a sentiment from the Short and Sweet set.  I used Chocolate Chip and Poppy Parade markers to ink the reindeer from the stocking in the Gift Givers stamp set, punched out the image with the 1 3/8" Circle Punch, and accented with a Scalloped Circle in Poppy Parade and a little 5/8" ribbon.  Easy-peasy, lemon squeezie!