Wednesday, December 19, 2012

Last-minute CAS for Christmas

I always seem to find myself making a few more Christmas cards at the last minute.  Sadly, thanks to the last minute thing, I'm far less than thrilled with how these photos came out!


Single-layer card with white embossing and clear (NOT yellow) rhinestones on Basic Gray cardstock.  
Snowflake image from Stampin' Up! Mixed Bunch stamp set.  I mixed a touch of Iridescent Ice emossing powder in with the white and it gave the snowflakes a subtle sparkle that I thought was just right for the feeling of softly falling snow against the gray background.   The photo just doesn't do this card justice.   I think I'm going to try this again for holiday thank you notes using Midnight Muse cardstock and the sentiment from Curly Cute.


Embossed the same image onto white this time and sponged each snowflake with Island Indigo and a touch of Not Quite Navy.  The sentiment is from one of the German sets available in the USA, Kleiner Wortschatz, and it's embossed in white onto the colored base.  


Hope you enjoyed these... have a peaceful holiday!


Thursday, December 13, 2012

Fall-i-days Grand Finale


This is the end, my friend!   The final blog entry in the last of the llama ladies' Fall-i-days blog hops.  If you click on the banner above, it will take you to the blog home page where you will find links to all the other blogs and hops.   At the bottom of this page, you'll find the buttons to click if you want to travel forward or backwards thru this hop.

I haven't blogged in ages because I was trying to get ready for my first craft show.  So now you get a mega-post with a few of the things I made!  (pics can be enlarged by clicking on them.)

Magic Santa Keys
  

Framelits Labels and Apothecary dies, Elegant Lines embossing folder, Lovely Labels punch for belt buckle
Cardstock in Whisper White, Real Red, Basic Black & Brushed Silver
Poem printed out with MDS2+
Retired Trinket Keys and Garden Green grosgrain ribbon


Lots of Gift tags - I used a lot of retired product on most of the tags, but these were made with currently available items.  (thank you Kath & Diane for sending mittens!)

 Nicely Knit wheel stamp, Baker's Twine
Punches:  Mitten, Ornament, Owl Builder (heart), Large circle & Scalloped circle
Garden Green, Real Red & Very Vanilla card stock for the mitten tag,
Baja Breeze & Night of Navy for the ornament.  You could use Brushed Silver cardstock for the ornament, but I actually glued yogurt lids to scrap cardstock, then after they dried, punched out the ornaments and ran them thru the Big Shot with different embossing folders.

 Gift Card holder
Very Vanilla, Always Artichoke, Riding Hood Red
Everything Eleanor, Holiday Hostess stamp sets
Basic pearls, Retired ribbon, non-SU! corner punch 


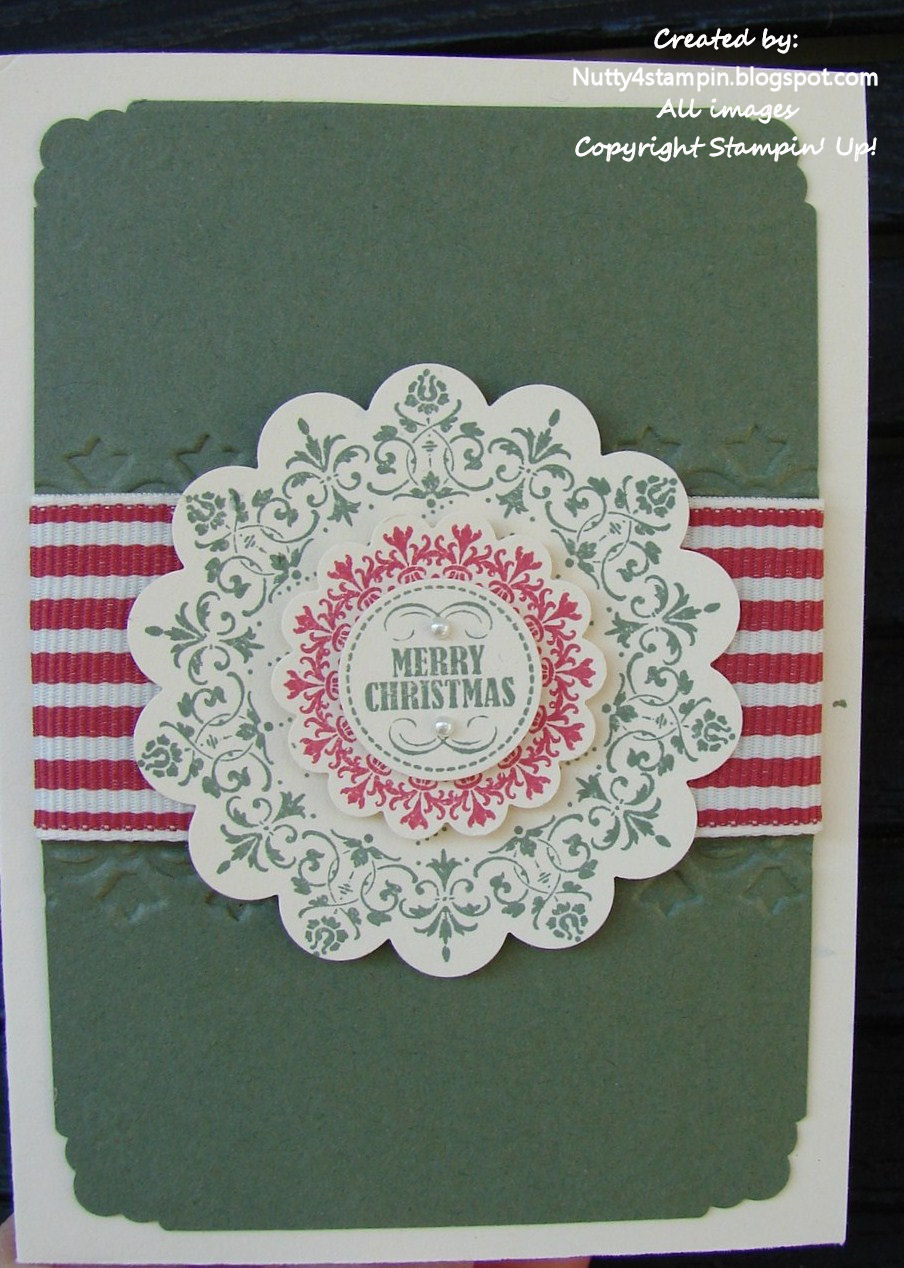
Wine bottle tags - I made a few different styles, but this was my favorite.  Thanks for the color combo, Buffy!

Cardstock:  Sage Shadow(retired) & Sahara Sand 
Just Beleive & Lacy Snowflakes (retired) stamp sets 
Ink:  Crumb Cake & Baha Breeze
Pennant and Boho Blossoms punches
Silver Glimmer Paper, Purely Pomegranate (retired) satin ribbon

Christmas Pocket Planner
Cover
I used Letters to Santa Designer Series Paper and Quick Accents, which are available on the Clearance Rack right now.   This was based on an idea found at http://christmasplanner.com/tour-christmas-planner/pocket-planners.  Since I started a regular white pocket folder, then accordion folded it, I needed different sized pages than the pre-printed ones I found, so I made some in MDS2, and of course then I could make the inside sheets coordinate using miniaturized versions of the Merry & Type digital stamp brush set!  If you mention the planner in a comment before Dec 31st 2012, I'll enter you in a free drawing for one!

First two pages
Last 2 pages


 Don't miss all the other lovely creations my friends have made.  Click the links below to check out the rest of the hop.   See you next year!


Wednesday, December 5, 2012

MDS for Advent

No sooner than Thanksgiving had passed, my kindergartener started asking if tomorrow was Christmas!  Clearly, an advent calendar was called for, and having none handy, what is a busy crafty mom to do?  Whip one up in MDS2 of course!  Super-simple, and my little darling just colors in one ornament each night before bedtime; when the tree is fully decorated, it will (finally!) be Christmas tomorrow!


Thursday, November 8, 2012

Stampin' Lllamas Christmas Blog Hop


It's here, it's here!!   That wonderful time of year when the elections are finally over and the thoughts of crafters turn to Christmas, and if you haven't started yet, it's time to get going!  I made some Christmas cards back in August, you can take a look at them *here* or click Christmas in the list of Labels in the left column to see all my Christmas projects.

I created 2 versions of my second Christmas card this year.  First a very simple version that would work well for mass-production, and then one that I've "stepped up" with dry-embossing, a colored base and a decorated interior panel.


  Stamp sets: Everything Eleanor, Delightful Dozen 
Colors: Garden Green, Raspberry Ripple, Whisper White  
Tools: Small Heart and Owl Builder punches, Framed Tulips embossing folder
Accessories:  Stampin' Dimensionals, glue dots, white taffeta ribbon
Techniques:  inked only the outer portion of the medallion stamp with a marker to create the wreath,  faux bow is punch art, fork bow dyed with Raspberry Ripple ink 


Finally, I used the same medallion stamp from Everything Eleanor with images from the Mixed Medley Hostess Set to create a square Christmas tag.  Colors are Always Artichoke and Raspberry Ripple.  


Follow the links below to see all the wonderful holiday projects in this blog hop from other Stampin' Up! Independent Demonstrators.


Tuesday, October 30, 2012

How could I have forgotten to tell you!   FREE digi stamps and paper this week and half off of digi kits.  The half off price won't display until checkout, so don't be discouraged, fill that cart!!  


Combine this offer with a 30-day FREE trial of MDS2, the latest and greatest version of Stampin' Up! digital design software.  Click the Promotions tab at the top of the page for more info!

Wednesday, October 24, 2012

Welcome to Wayback Wednesday

Wayback Wednesdays feature at least one retired product.  This Halloween card uses one of my favorite retired Stampin' Up! punches.  I CASEd the idea from Andrea Walford, but as most of us do when CASEing, I added my own twist to her card.  


Rather than mask a circle for the moon while sponging the background, I used a large circle punch on So Saffron card stock; stamped it in gray with the splotch from French Foliage, and sponged the edges with Pumpkin Pie and a touch of Cajun Craze for my harvest moon.  

She drew her bat, I made mine from black Shrinky Dink plastic and the Bitty Bat punch (retired but still available on the Clearance Rack; wink, wink).2


Clouds: Frost White shimmer paint

Sentiment from Delightful Dozen stamped in Craft White ink.  I used white embossing powder on the words and the Black Magic Technique to color the pumpkin (colored pencils on white ink on a black background).

Inks for night sky background: Basic Black, Elegant Eggplant, Midnight Muse and Marina Mist.

Monday, October 22, 2012

Fall Thank you


Here's a quick Thank You note I whipped up this morning using the always wonderful Day of Gratitude stamp set.  You can make this card without square punches, but I've found that I just LOVE how perfect the  smallest squares are when using a punch, and of course I love the ability to align the stamped image exactly where I want it within the punched shape.  I've used Confetti card stock, as well as Rich Razzleberry, Pumpkin Pie, Cajun Craze and Old Olive.  Each image is glued to a matching mat which is popped up with dimensionals.


You can't see one of my favorite things about this card, tho'... I have the marker in Cajun Craze, so I used the fine point to write my message inside.  Also, my handwriting didn't look too horrific today, so that was a big plus!!


Wednesday, October 17, 2012

Steampunk Birthday Card

I've been wanting to make a vintage card with Stampin Up!'s Moving Forward set, and I needed a masculine card, so here is what I came up with.  I stamped the blimp once in red and a second time in blue, cut out the red one, used colored pencils on the flags, sponged the edges and mounted the red one popped up.

     Stamp sets:  Open Sea, Moving Forward
     Colors: Cherry Cobbler (Core'dinations), Island Indigo, So Suede (ink)
                More Mustard 
     Tools:  Sizzix Big Shot, Stripes Embossing Folder, Button Embosslit die, 
               sanding block, Word Window punch, Heat Tool
     Other:  Gold Stampin' Emboss powder,  Stampin' Dimensionals 


 A close-up, so you can see some details.  I distressed the edges of most layers with scissors and sanded the raised embossed stripes.  The blue circle is the globe stamp from Open Sea.  The globe and the captain's log are stamped over the red background and the edges of the Very Vanilla card base.    

I dipped the yellow paper buttons into the embossing powder and tapped most of it off before heating, then inked the edges in an attempt to create vintage-looking buttons.

Wednesday, October 10, 2012

An early Christmas gift from Stampin Up!

It's only October, but Stampin' Claus is coming to town! Get a FREE Festive Paper-Piercing Pack when you purchase the Ornament Keepsakes Set and Candlelight Christmas Specialty Designer Series Paper.  You can get the bundle with or without the cutting dies, with stamps in wood or clear-mount.   Click here to take advantage of this great offer while it lasts!


Thursday, October 4, 2012

Fall-i-days Thanksgiving Blog Hop


If you started our hop at the beginning with Debbie, you have no doubt seen some fantastic things today.   Hope you like what I've done for my version of a turkey card using the owl punch.  He's supposed to look like his eyes are closed in contemplation - not sure that's working, but there it is.


Colors:  Real Red, More Mustard, Soft Suede, Very Vanilla
Stamps:  Day of Gratitude, Lovely Little Labels
Tools:  Framed Tulips embossing folder, Window Frames framelits dies, Owl Builder Punch

I made the eyelids by punching out the medium circles, putting them onto a Post-it, then putting them into the punch again on the same circle, but offset.

The trimmed Window frame shape is most easily and thriftily done by lining up the corners on the die with the edge of the card stock.

One of our group wasn't able to join us on time due to technical difficulties, but since I'm at the end, I thought I'd add the link to her beautiful projects (click here).  She has a link back the main page for the blog hop, so you won't get lost if you visit her.  You can still get back to the beginning of the hop if you started somewhere in the middle.


To go back to the beginning of the hop, click here: 

To return to the previous stop on the hop, click here:


Monday, October 1, 2012

Calm Pink Cupcake

A dear friend of mine had a birthday this weekend.  She loves pink and bling and cupcakes, so while this was not my usual style, thanks to Stampin' Up!, it came together easily.  I used the grids available for the clear blocks to mount the two parts of the sentiment in perfect alignment, the piercing template added just the right amount of definition to the edge of the white panel, and frosting the cupcakes with Dazzling Details makes them totally scrumptious!


Stamp set:  Keep Calm (Hostess)
Cardstock:  Melon Mambo, Whisper White, Vellum
Ink: Melon Mambo
Tools:  Essentials Piercing Pack, Apothecary Labels Framelits, Big Shot, Lacy Brocade Embossing Folder
Accessories:  Dazzling Details, Basic Jewels Rhinestones

Tuesday, September 18, 2012

MDS Happiness

A friend posted this wonderful quote on Facebook, and I thought what a great little frameable it would make with the right artwork around it.   I started with one of the designer templates that came with My Digital Studio, called Sunny Day.  I tweaked it to create the trees and house by filling punches with different digital DSP, and found the sun in one of the collections of embellishments.


Monday, September 17, 2012

Monday / Friday Challenges

I combined the sketch from Mojo Monday 259 with the color combination from Fab Friday #2 to come up with this card.  I really love how it came out, maybe I should play along with more challenges!  I stuck to the sketch pretty well, but I goofed and used Summer Starfruit instead of So Saffron for the colors.


Stamps: Hello Doily, Curly Cute
Ink:  Basic Gray  Cardstock:  Sahara Sand, Basic Gray, Summer Starfruit
Embossing Folders:  Flower Garden, Delicate Designs
Tools:  Large Scallop Edgelit, Sizzix Big Shot
EmbellishmentsStampin' Up! Antique Brad and Crochet Trim
Techniques:  Sponging, Dry Embossing 


To get the more intense look from the lace embossing folder, I rubbed an inkpad onto the raised side of the folder before I embossed.   Another tip when using a die cutting machine - always cut first, then emboss!


Friday, September 14, 2012

Amateur Hour

A tip for organizing Piercing Templates with the coordinating dies and embossing folders

A couple of weeks ago, I realized that my first blogiversary is coming up, so I thought to note the occasion, I'd try something new.   I've done a few tutorials so far, but never a video.   Now that I've tried it, I have SO much appreciation for those that do them regularly.   Thank you for watching what is really more of a study in how tough it is to do a good video!


Feel free to leave me a comment to let me know how I did!   What do you think of the organizational tip?   Don't think I'll try this again unless I find something to hold my camera for me and get more lights! 

Thursday, September 13, 2012

Halloween Llama Blog Hop


So excited that the second in our series of Fall-i-days blog hops is finally here, and I'm at the beginning of it!   I know my fellow demonstrators have come up with fun and inspiring projects for you!   For links to all their blogs and all of our llama hops, click on the gorgeous banner up there that Stephanie created!

The first thing I'd like to share with you today is a Halloween card.   I love the versatility of stamp sets like this one with lots of little images; they work for treats, tags, cards, anything really!  So cute, too.


Stamps: Spooky Bingo Bits 
Ink: Basic Black, Old Olive, Rich Razzleberry, Pumpkin Pie 
Cardstock: Old Olive, Basic Black, Very Vanilla, Pumpkin Pie 
Tools / Accessories: 1" circle & Curly Label punches, Stampin' Dimensionals
Technique:  Faux Tearing (sponging w/ a torn mask) and actual tearing


Next is a teacher thank you card I created for this week's Mojo Monday sketch challenge using My Digital Studio.   Since version 2 of the software is now in full release, Stampin' Up! is donating the remaining disks of version 1 to schools.   Contact me or your local demonstrator if you would like more information.


I printed out the image from Greeting Card Kids and colored it by hand, then scanned it in and inserted it into my project like a photograph. Used the eyedropper tool to color the circles and the mat of the oval the same red as the girl's apple and the blue of the boy's book.  In the new version of the software, images can be colored digitally; so easy! 


Finally, the first card I've ever made with French Foliage!  A wedding invitation inspired me to make a card stamped with purple leaves.  What do you think?

Stamps: French Foliage, Curly Cute 
Ink: Crumb Cake, Elegant Eggplant, Rich Razzleberry 
Cardstock: Whisper White, Perfect Plum 
Accessories: Linen Thread
Technique: OSW (one-sheet wonder:  create your own patterned paper with your stamps, here I did a half sheet that I cut into strips to make a set of matching cards)

Next in the hop is Marsha, or, if you like to do things backwards, click on the other button to head back to Debbie!


Tuesday, September 4, 2012

Handbags Helping Hearts

I wanted to make a donation to a local charity auction, and needed to make a paper purse large enough to fit A2 cards.  I scanned the interwebs, and found lots of things I liked, but none were quite what I was looking for.   My favorite simple design was at Mel Stampz, but her template was too small, so I created my own.


I used Stampin' Up!s Decorative Accents Edgelits to create the curve at the top, and the "leather" edging (yes, its Chocolate Chip cardstock)


So that you can still get the cards in and out, the handle has to be able to move, so I attached it with brads, SU! Antique, of course!  I thought about continuing the brown CS around the ends, but flowers  seemed prettier.   These are fabric ones I had leftover from the retired Pretties Kit, but the currently available Paper Daisies, as well as several Stampin' Up! dies or punches would work just as well.

If you would like me to put up a template or tutorial for this project, please let me know in the comments!

Update:  I am working on a tutorial, but I'm also working on some projects for a blog hop that starts Thursday and I have a crazy number of meetings and school activities this week.   Thanks for your patience!

Friday, August 31, 2012

Black Doily

I'm going to be so sad when Pool Party retires as a color next summer;  it looks smashing with so many other colors.  This is such a simple card, all the "Oooooh!" is in the pairing of the pale aqua with black.  


Stamps: Moving Forward 
Ink: Basic Black 
Cardstock: Pool Party, Island Indigo, Basic Black, Whisper White 
Tools: Modern Label, Word Window & Boho Blossoms punches, Paper Doily Die
Accessories: Basic Jewels Rhinestones, 2-way Glue Pen, Stampin' Dimensionals

Wednesday, August 22, 2012

My Blogiversary is coming up!

I have some fun ideas brewing for my first blogiversary next month!   Here's a little teaser; an anniversary gift idea I created using My Digital Studio  (inspired by this idea on Pinterest).


I saved the 12"x12" scrapbook page as a jpg file at its highest resolution and had it printed out at Wally-mart as a faux canvas w/a mirrored edge, meaning the outside edge of the canvas had a mirror image of the outer 1.5" of the project. (I made sure to keep my important elements at least 1.5" away from the edge of the page, otherwise they would be repeated on the side.)  No need for a frame and they had it done in under 2 hours!   Talk about instant gratification!

PS - I did alter this a bit for internet consumption.  The version I actually had made had different maps and more specific text.   I just thought the idea was too neat to keep to myself!

Monday, August 13, 2012

All the colors of the bird-bow

Bird rainbow, birdbow?
My inspiration for today's bird card came from Lin at Sending Hugs.  I often see things on Pinterest that I love and think "I can so CASE that with all Stampin' Up! stuff!"   I used the bird stamp from Everything Eleanor and cut them out.   I wasn't loving them with any of my embossing folders, so I used the Lattice Die and cut a couple pieces of thick chipboard (cut through it like butter!) and then used them to dry-emboss the CS in the Big Shot with the Silicone Embossing Mat.  Because I had used such thick chipboard, this technique made holes in white CS, so I switched to Sahara Sand.  The sentiment is from Friendship Preserves and is die cut with the Window Frames Framelits, both from the 2012 Holiday catalog.   I used lots of In Color inks:  Rich Razzleberry, Marina Mist, Gumball Green, Summer Starfruit, Calypso Coral and Primrose Petals.

Thanks for stopping by!    More birds  Here!

Saturday, August 11, 2012

Lovely Bella personalized note cards

A set of simple monogram cards makes a great gift for anyone, including teachers!   This first one is a perfect example of why SU! color coordination makes creating easy; without cardstock and ink in the same shade of blue, I wouldn't have been able to make this.  


Stamps:  Lovely Letters, Bella Boutique (wheel).   
Ink:  Midnight Muse 
Cardstock:  Whisper White, Midnight Muse 
Tools: scalloped square punch, 1" square punch, distressing tool


Here is a more distressed variation using fall colors:


Ink:  Cajun Craze 
Cardstock:  Very Vanilla, Old Olive, More Mustard
Tools:  Curly Label punch, 1 1/4" square punch


If you've ever tried to cut a smaller square with your trimmer, you know it can be challenging.  Combine that with my inability to stamp straight and this card would have looked a crooked mess, but the square punch came to my rescue!   I punched the square so that the W was evenly spaced from 3 sides, then trimmed off the final side to get a perfect rectangle - phew!


Thursday, August 9, 2012

Fall-i-days Llama Blog Hop

The Stamping Llamas are planning a blog hop every month starting now through the holidays.   You will be treated to gorgeous projects using products from the Stampin' Up! Annual and Holiday catalogs!  I'm going to try and do one Christmas project for each hop as well as things for each of the Fall-i-days.


Back to School

My two favorite fallbacks for handmade teacher gifts are packaged cards and decorated hand sanitizer.   Pretty + Practical = Perfect!   I posted some monogrammed notecards here, but here is this year's version of something every elementary school teacher needs:


Stamps:  Four Seasons (Hostess Exclusive),  acorn from Day of Gratitude   
Ink/Markers:  Pool Party, More Mustard, Soft Suede, Early Expresso, Riding Hood Red 
Cardstock:  Pool Party, More Mustard, Early Expresso, Very Vanilla   
Tools: 3/4" and 1" circle punches, 2 3/8" Scallop Circle Punch, Perfect Pennants Bigz Die
Accessories:  Very Vanilla seam binding ribbon


Christmas

When designing Christmas cards, it's good to think about how easy and cost-effective  it will be to mass-produce the card.  I like the challenge of making something that is simple, yet still gets an "oooooh" from the recipient!   I made a few different versions of this card; do you have a favorite?   

Here, the first and most CAS version:  single layer, just stamping and punching:


The second version has the snowflake image stamped in Versamark all over the background and embossed with Iridescent Ice powder for a little extra shimmer:


On this one, I created the look of a banner using the Simply Scored tool.


On this last version I used the Simply Scored to create a simple frame around the image:


Stamps:  Four Seasons (Hostess Exclusive),  snowflake from Every Little Bit,  greeting from Curly Cute.   
Ink:  Wisteria Wonder 
Cardstock:  Whisper White 
Tools: 3/4" and 1" circle punches, Simply Scored or heat gun (depending on which version)
Accessories:  Silver Glimmer paper


P.S.  The other day I promised cards with birds, and here I've used the Four Seasons set twice and both times I covered up the adorable bird!   Don't worry, I've been busy and more birds are in this next post!


You can use these gorgeous buttons (that Stephanie designed in MDS2) to navigate the hop.